In this Document
| Goal |
| Solution |
| Installing New RCU Schemas In The New Oracle Database |
Cloning The Database Where The Original RCU Schemas Are Held To Move Them To A New Oracle Database |
| References |
APPLIES TO:
Business Intelligence Suite Enterprise Edition - Version 12.2.1.2.0 and laterBusiness Intelligence Server Enterprise Edition - Version 12.2.1.0.0 and later
Information in this document applies to any platform.
GOAL
You have installed OBIEE 12c.
The RCU database is required to move from one host to another and the hostname of the database has changed.
This document describes the steps to reconfigure your OBIEE-to-RCU database connections in this situation.
The examples provided are for an Oracle database.
The document details two possible alternative ways to accomplish the task:
- New RCU schemas are installed in the new target Oracle database.
In this case, the security store needs to be migrated or re-associated from the source Oracle database to the new target Oracle database where the RCU schemas are to be installed. This is needed because the newly created OPSS schema contains no security store.
OR
- The database where the RCU schemas are hold is moved or "cloned" using some cloning Oracle DBA utility and imported into the new target Oracle database.
In this case, the security store residing in the source Oracle database within the OPSS RCU schema is moved as result of the database cloning process. No additional steps are required regarding the security store beyond what is done by the Oracle database cloning utility.
Note:
Ensure you have a cold backup of your entire installation.
Ensure you backup any file before modifying.
Ensure you have a cold backup of your entire installation.
Ensure you backup any file before modifying.
SOLUTION
Installing New RCU Schemas In The New Oracle Database
- Create new RCU schemas in the new Oracle database. You can use the same schema prefix that you used for the original schemas or a new prefix. In this example, the schema prefix used is "BIEE". Run the RCU utility to create the new schemas:cd [DOMAIN_HOME]/oracle_common/bin
./rcu
In the RCU schema selection screen, check "Oracle Business Intelligence" check box (BIEE_BIPLATFORM) to create the OBIEE schemas. The following schemas are created:BIEE_STB
BIEE_OPSS
BIEE_IAU
BIEE_IAU_APPEND
BIEE_IAU_VIEWER
BIEE_BIPLATFORM
BIEE_MDS
BIEE_WLS - Create a data source in the Weblogic console to support the reassociatesecuritystore WLST command.
The reassociatesecuritystore command connects to the old database using the original data source for OPSS in Weblogic and gets the security store data. That data is transferred to the new database by connecting through this new connection. This is all done in the same step by the reassociatesecuritystore command.
Follow these steps to create the connection:
- Log in to the Weblogic console.
- Click on Lock and Edit
- Navigate to Services -> Data Sources
- Click on New -> Generic Data Source. Provide:
Name: opss-data-source_NEW
JNDI Name: jdbc/OpssDataSource_NEW
- Click on Next
- Click on Next again
- Click on Next again
- Provide:
Database Name: your NEW database SID
Hostname: your new database hostname
Port: your new database listener port
Database User Name: the <prefix>_OPSS schema in the new database. Example: BIEE_OPSS
Password: the password you specified for the <prefix>_OPSS schema in the new database
- Click on Next
- Click on Test Configuration. You should get a 'Connection test succeeded." message at the top of the screen.
- Click on Next
- Check both "AdminServer" and bi_cluster check boxes
- Click on Finish
- Click on opss-data-source_NEW link to edit the new connection
- Click on Connection Pool sub tab under Configuration tab
- Click on Advanced
- Update the following parameters:
Initial Capacity: 0
Minimum Capacity: 0
Test Frequency: 300
Connection Creation Retry Frequency: 10
- Click on Save
- Click on Activate Changes - Re-associate the security store to the new database.
a) You need to get the "datasourcename" parameter for the new OPSS data source that you created. That is NOT the name you see in the Weblogic console.
The data source name for the command is actually the JNDI name you provided when you created the connection. You can find in the configuration file for the connection.
Open a shell session to the server and run:cd [DOMAIN_HOME]/config/jdbc
more opss-datasource-jdbc-xxx.xml ---> This is the configuration file of the new connection you created in the Weblogic console
The name you need is in tag:<jndi-name>jdbc/OpssDataSource_NEW</jndi-name>
So, "OpssDataSource_NEW" is the datasourcename that you need to use in the command.
b) You need to enable runtime MBeans to run the reassociatesecuirtystore command:cd [DOMAIN_NAME]/oracle_common/common/bin
./wlst.sh|.cmd
connect('weblogic','Admin123','t3://localhost:7001')
edit()
startEdit()
cd('JMX/bi')
cmo.setDomainRuntimeMBeanServerEnabled(1) --> This command may appear to fail or return an error but it actually enables the MBean as needed.
activate()
disconnect()
exit()
c) Run the reassociatesecuritystore command. These are the parameters of the command that re-associates the security store:
- domain: this is your domain name. You can get it from the directory name under user_projects
- servertype: use this value: DB_ORACLE
- datasourcename: JNDI name you get in previous step
- jpsroot: use this value: cn=jpsRoot
- jdbcurl: use this format: jdbc:oracle:thin:@localhost:1521/PDBORCLNEW
- jdbcdriver: use this driver: oracle.jdbc.OracleDS for 12.2.1.2 and lower versions. Use jdbcdriver=oracle.jdbc.OracleDriver for 12.2.1.3 and higher versions.
- dbUser: the database <prefix_OPSS user in the new database. Example: BIEE_OPSS
- dbPassword: <prefix>_OPSS user password
Example commands and output:./wlst.sh|.cmd
connect('weblogic','Admin123','t3://localhost:7001')
reassociateSecurityStore(domain="bi",servertype="DB_ORACLE",datasourcename="jdbc/OpssDataSource_NEW",jpsroot="cn=jpsRoot",jdbcurl="jdbc:oracle:thin:@localhost:1521/PDBORCLNEW",jdbcdriver="oracle.jdbc.OracleDriver",dbUser="BIEE_OPSS",dbPassword="Admin123")
Already in Domain Runtime Tree
Starting policy store reassociation.
The store and ServiceConfigurator setup done.
Schema is seeded into the store
Data is migrated to the store. Check logs for any failures or warnings during migration.
Data in the store after migration has been tested to be available
Update of in-memory jps configuration is done
Policy store reassociation done.
Starting credential store reassociation
The store and ServiceConfigurator setup done.
Schema is seeded into the store
Data is migrated to the store. Check logs for any failures or warnings during migration.
Data in the store after migration has been tested to be available
Update of in-memory jps configuration is done
Credential store reassociation done
Starting Keystore reassociation
The store and ServiceConfigurator setup done.
Schema is seeded into the store
Data is migrated to the store. Check logs for any failures or warnings during migration.
Data in the store after migration has been tested to be available
Update of in-memory jps configuration is done
Keystore reassociation done
Starting audit store reassociation
The store and ServiceConfigurator setup done.
Schema is seeded into the store
Data is migrated to the store. Check logs for any failures or warnings during migration.
Data in the store after migration has been tested to be available
Update of in-memory jps configuration is done
Audit store reassociation done
Jps Configuration has been changed. Please restart the application server.
disconnect()
Disconnected from weblogic server: AdminServer
wls:/offline> exit()
Exiting WebLogic Scripting Tool.
The reassociateSecurityStore command updates these 2 files:
- jps-config.xml
- jps-config-jse.xml
At this point, proceed to the "Cloning The Database Where The RCU Schemas Are Held To Move Them To A New Oracle Database" section in this note and follow all steps detailed there. - After the process is complete, you can either (both ways mentioned below have been tested):
a) Keep the data source you created in Weblogic since OBIEE is using that one now to connect to the security store
OR
b) Update the original connection for OPSS in Weblogic console to reflect the connection information of the new database.
Once the change is made, stop OBIEE instance, start it and connect to Analytics. You should be able to successfully connect to Analytics. Then you can go to the Weblogic console and delete the new connection you created to do the reassociation of the security store. - If you are using the Scheduler or Usage Tracking, and you want to keep the history in those tables (Agents and Usage Tracking activity), you need to export the rows from the source database tables and import them in the new target database tables.
Cloning The Database Where The Original RCU Schemas Are Held To Move Them To A New Oracle Database
- Stop the environment:
[DOMAIN_HOME]/bitools/bin/stop.sh|.cmd - Update the database connections via the following files.
You may want to search within the files for the keyword 'jdbc' as there may be multiple lines to change.
This note will not provide every example entry, please double-check your files.- [DOMAIN_HOME]/config/fmwconfig/jps-config.xml
- [DOMAIN_HOME]/config/fmwconfig/jps-config-jse.xml
- [DOMAIN_HOME]/config/fmwconfig/jps-config-jse.xml.tmp
- [DOMAIN_HOME]/config/fmwconfig/fmwconfig/jps-config-temp.xml
- [DOMAIN_HOME]/config/fmwconfig/jps-config-temp-xxxxxxxxxxxxxxx.xml
For example:<property name="jdbc.url" value="jdbc:oracle:thin:@//dbhost.domain:1521/ORCL"/>
<property name="audit.loader.jdbc.string" value="jdbc:oracle:thin:@//dbhost.domain:1521/ORCL"/>
- [DOMAIN_HOME]/config/fmwconfig/bienv/core/datasource.properties
For example:
datasource.biplatform.url=jdbc\:oracle\:thin\:@(DESCRIPTION\=(ADDRESS_LIST\=(ADDRESS\=(PROTOCOL\=TCP)(HOST\=dbhost.domain)(PORT\=1521)))(CONNECT_DATA\=(SERVICE_NAME\=ORCL))) - [DOMAIN_HOME]/config/fmwconfig/bienv/core/odbc.ini
Note: The default DSN for Oracle Delivers (scheduler) in [DOMAIN_HOME]/config/fmwconfig/biconfig/OBISCH/schedulerconfig.xml
[opss_datasource]
HostName=dbhost.domain
PortNumber=1521
Driver=/app/oracle/biee/bi/common/ODBC/Merant/7.1.4/lib/ARora27.so
EnableNcharSupport=1
ServiceName=MySID
Description=DataDirect 7.1.4 Oracle Wire Protocol
[biplatform_datasource]
HostName=dbhost.domain
PortNumber=1521
Driver=/app/oracle/biee/bi/common/ODBC/Merant/7.1.4/lib/ARora27.so
EnableNcharSupport=1
ServiceName=MySID
Description=DataDirect 7.1.4 Oracle Wire Protocol - All files in: [DOMAIN_HOME]/config/jdbc
Note: This is the same as updating the connection pools via Weblogic console (AdminServer must be running for that method to be available)- [DOMAIN_HOME]/config/jdbc/bip_datasource-jdbc.xml
- [DOMAIN_HOME]/config/jdbc/BIPlatformDatasource-jdbc.xml
- [DOMAIN_HOME]/config/jdbc/LocalSvcTblDataSource-jdbc.xml
- [DOMAIN_HOME]/config/jdbc/mds-owsm-jdbc.xml
- [DOMAIN_HOME]/config/jdbc/WLSSchemaDataSource-jdbc.xml
- [DOMAIN_HOME]/config/jdbc/jdbc/opss-audit-jdbc.xml
- [DOMAIN_HOME]/config/jdbc/opss-auditview-jdbc.xml
- [DOMAIN_HOME]/config/jdbc/opss-datasource-jdbc.xml
- [DOMAIN_HOME]/config/jdbc/WLSServicesDatasource-jdbc.xml
- Execute DOMAIN_HOME/bitools/bin/sync_midtier_db.sh|cmd as documented
See: System Administration Guide - Appendix D - BI-Specific WLST Command Reference for details of running the script
Note: If you are using Active GridLink (AGL) with a SCAN address JDBC style link, you may encounter an error syncing the database../sync_midtier_db.sh
Apr 17, 2018 3:26:06 PM com.oracle.cie.domain.info.variable.DomainVariableServiceImpl <init>
INFO: initializing domaininformation object.
Apr 17, 2018 3:26:09 PM com.oracle.cie.domain.info.variable.DomainVariableServiceImpl <init>
INFO: initializing domaininformation object.
Syncing mid tier database in expanded domain.
-- 1 -- Read datasource from WebLogic
Apr 17, 2018 3:26:34 PM com.oracle.cie.domain.security.DomainSecurityService entropyWarning
INFO: Time required to process encryption was longer than expected: 25339ms; possible lack of entropy might result in poor performance (getEncryptionContext)
Base datasource:
Type: Oracle
URL: jdbc:oracle:thin:@//localhost:1521/PDBORCLNEW
Properties:
SendStreamAsBlob = true
user = BIEE_BIPLATFORM
oracle.net.CONNECT_TIMEOUT = 10000
Driver oracle.jdbc.OracleDriver
-- 2 -- Syncing JPS configuration in file: /app/oracle/biee/user_projects/domains/bi/config/fmwconfig/jps-config.xml
Setting odbc.dsn=opss_datasource
-- 3 -- Syncing JPS configuration in file: /app/oracle/biee/user_projects/domains/bi/config/fmwconfig/jps-config-jse.xml
Setting odbc.dsn=opss_datasource
-- 4 -- Syncing BI Scheduler database configuration
Setting DSN to biplatform_datasource
-- 5 -- Syncing database connection properties to config/fmwconfig/bienv/core/datasource.properties
Saving DB connect properties to: /app/oracle/biee/user_projects/domains/bi/config/fmwconfig/bienv/core/datasource.properties
2018-04-17T15:26:36.219-05:00
-- 6 -- Syncing ODBC configuration at /app/oracle/biee/user_projects/domains/bi/config/fmwconfig/bienv/core/odbc.ini
Configuring DSN : opss_datasource
Updating credential for data source : opss_datasource
Setting credentials
Apr 17, 2018 3:26:40 PM oracle.security.opss.internal.runtime.ServiceContextManagerImpl getContext
WARNING: Bootstrap services are used by OPSS internally and clients should never need to directly read/write bootstrap credentials. If required, use Wlst or configuration management interfaces.
Configuring DSN : biplatform_datasource
Updating credential for data source : biplatform_datasource
Setting credentials
Apr 17, 2018 3:26:40 PM oracle.security.jps.JpsStartup startWithRetry
INFO: Jps initializing.
Apr 17, 2018 3:26:47 PM org.hibernate.validator.internal.util.Version <clinit>
INFO: HV000001: Hibernate Validator 5.1.3.Final
Apr 17, 2018 3:26:53 PM oracle.security.jps.internal.common.util.JpsCommonUtil initPolicyProvider
INFO: Initializing OPSS Java Policy Provider.
Apr 17, 2018 3:26:53 PM oracle.security.jps.internal.common.util.JpsCommonUtil initPolicyProvider
INFO: OPSS Java Policy Provider initialized.
Apr 17, 2018 3:26:53 PM oracle.security.jps.internal.common.util.JpsCommonUtil initPolicyProvider
INFO: OPSS Java Policy Provider is set as the system-wide Policy object.
Apr 17, 2018 3:26:53 PM oracle.security.jps.JpsStartup startWithRetry
INFO: Jps started.
Apr 17, 2018 3:26:54 PM oracle.security.audit.Auditor init
WARNING: IAU:IAU-6012: Unable to determine the audit log directory. No log directory specified.
Apr 17, 2018 3:26:54 PM oracle.security.jps.util.JpsUtil disableAudit
INFO: JpsUtil: isAuditDisabled set to true
Apr 17, 2018 3:26:54 PM oracle.security.jps.internal.audit.AuditServiceImpl validateLogPossible
WARNING: No audit log directory is set. Cannot perform audit operations for component JPS.
Currently (12.2.1.2 and lower), the only working TNS style for sync_midtier_db is:
(DESCRIPTION=(ADDRESS_LIST=(LOAD_BALANCE=on)(ADDRESS=(PROTOCOL=TCP)(HOST=host)(PORT=port))(ADDRESS=(PROTOCOL=TCP)(HOST=host1)(PORT=port1)))(CONNECT_DATA=(SERVICE_NAME=service)))
sync_midtier_db reads only opss_datasource and biplatform_datasource.- There is a workaround:
- Configure the connection properties via the form in the Weblogic Console.
https://docs.oracle.com/middleware/1212/wls/JDBCA/gridlink_datasources.htm#JDBCA460
This will generate a multiple address [non-SCAN] URL including LOAD_BALANCE=on - Run sync_midtier_db
- Convert the JDBC URL back to the single SCAN address via the Console or files.
- 12.2.1.3 will be updated to support single SCAN address for sync_midtier_db
- Configure the connection properties via the form in the Weblogic Console.
- There is a workaround:
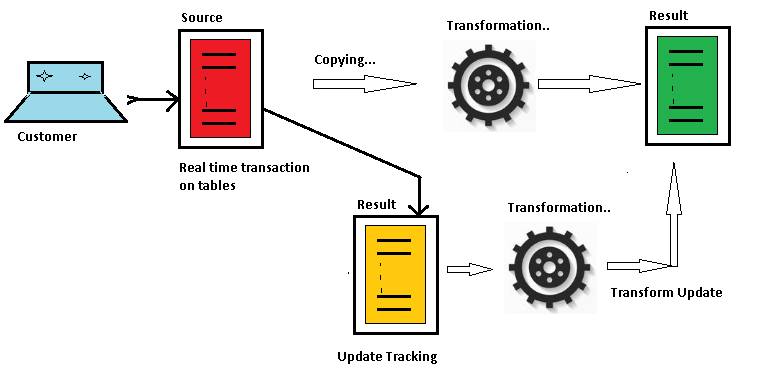
- If you are using the RCU database for Usage Tracking, then update your connection pools in the repository (RPD).
- By default, no Initialization Blocks use the RCU database, this is just a notation to check in case you have used the RCU database for any reason other than what is configured during a default installation.
- If you followed the approach of installing new RCU schemas go back to "Installing New RCU Schemas In The New Oracle Database" section in this note and decide if you want to complete the last 2 optional steps listed concerning the data source connection you created in Weblogic and the historical data in the Scheduler and Usage Tracking tables.